
Emails not sent from the server is one of the most common issues a XenForo forum admin may encounter and it means no contact emails will be delivered. But more importantly, members won’t get email notifications about private conversations, thread update notifications of watched threads, forum update notification of watched forums etc.
Email is one of the most crucial functionality for any forum and it is the sole reason for members to come back and start engaging in the forum again.
In this article, I will show you how to fix XenForo email issues and switch over to Amazon’s simple email services or SES to send all XenForo emails.
Why No Emails from a XenForo forum?
The most common reason for no emails from XenForo is your hosting or server isn’t configured to send emails using the default PHP mail function.
The other reason can be emails are being sent by XenForo, but it fails the needed check of a genuine email and fails to even make it to your spam folder making you feel the email isn’t sent at all.
Sending email using PHP isn’t recommended and can have issues on few server configuration.
![]()

Default PHP option is never a good choice to send emails and so every website should use SMTP to send emails. Any external SMTP service providers can be used and I am going to show a step by step process to start sending emails in XenForo using Amazon’s Simple Email Service or SES using SMTP.
Step 1: Verify the Domain
The first step to using Amazon’s SES service is your email should originate from @yourdomain.com. First, we have to verify the domain before being able to send emails using 2yourdomain.com.
If you have already verified your domain in Amazon SES, you can move to the next step to generate the SMTP details.
A verified domain is preferred over a verified email address because once the domain is verified, you can send emails from any of the @yourdomain emails.
Visit the Simple Email Service or SES within the Amazon AWS console.
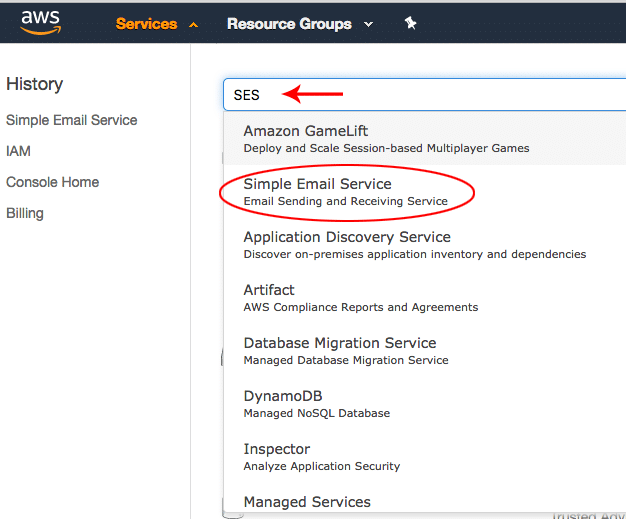
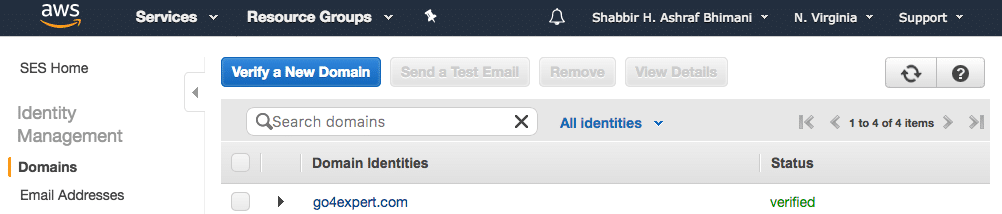
Inside the SES console, click domains and click Verify a New Domain button at the top.

It opens up a domain entry popup. Enter the domain name and make sure Generate DKIM settings is checked.
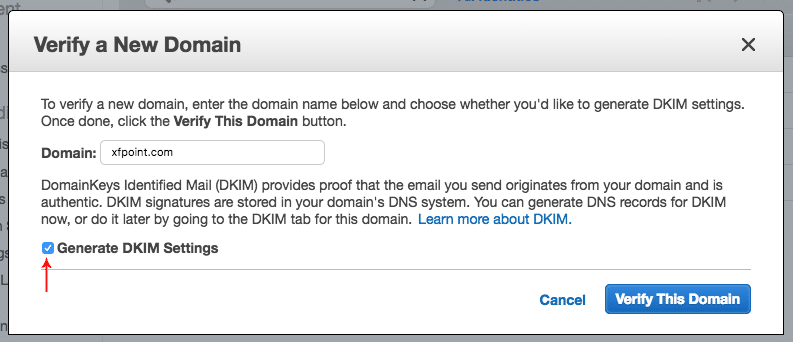

Once done, Click Verify This Domain. It will generate the needed DNS settings to be added to the domain’s DNS. If you aren’t able to copy the complete record, download the records as a CSV file and copy it.
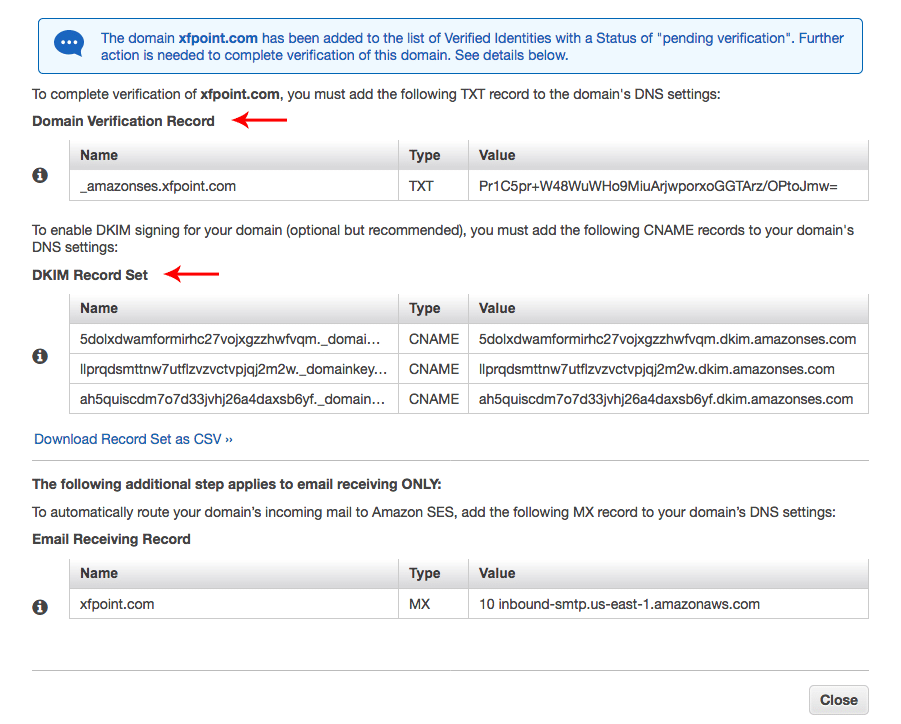

We will only use Amazon SES to send emails and won’t use it for receiving emails but if you plan to use Amazon SES for receiving email, you may need to add the MX record as well.
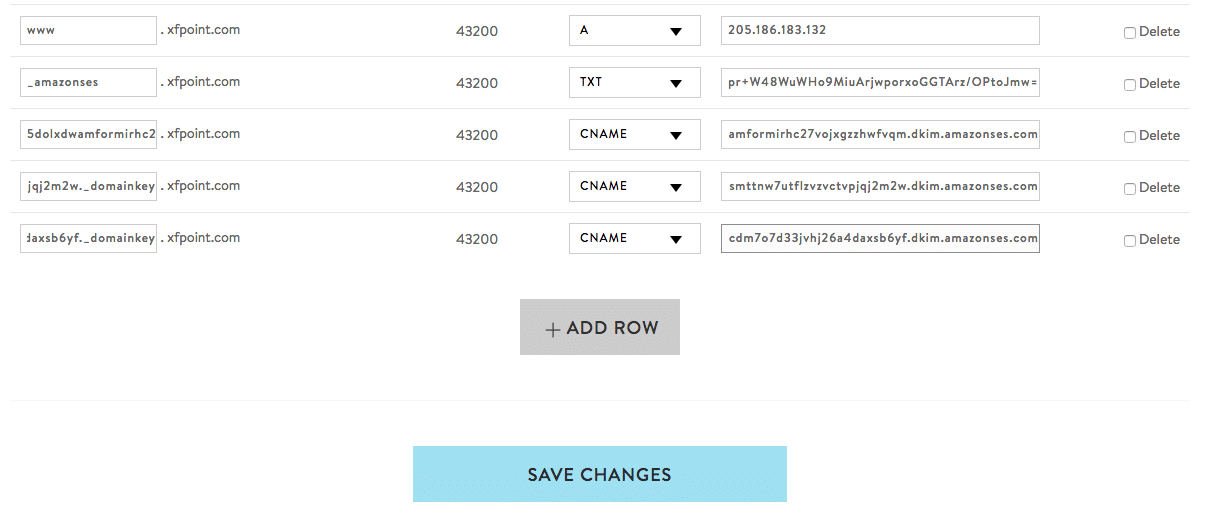

The records for Domain Verification and DKIM are entered into the domain hosting’s DNS interface. The interface can vary from host to host.


The domain will be shown as pending verification but in few moments, it will be automatically verified.
![]()

And you will have email notification of successful verification.


The time taken to verify the domain can again vary based on the update of DNS records by your hosting.
Step 2: Create SMTP Credentials
Let us generate SMTP credential details to be able to send emails using our domain inside XenForo.
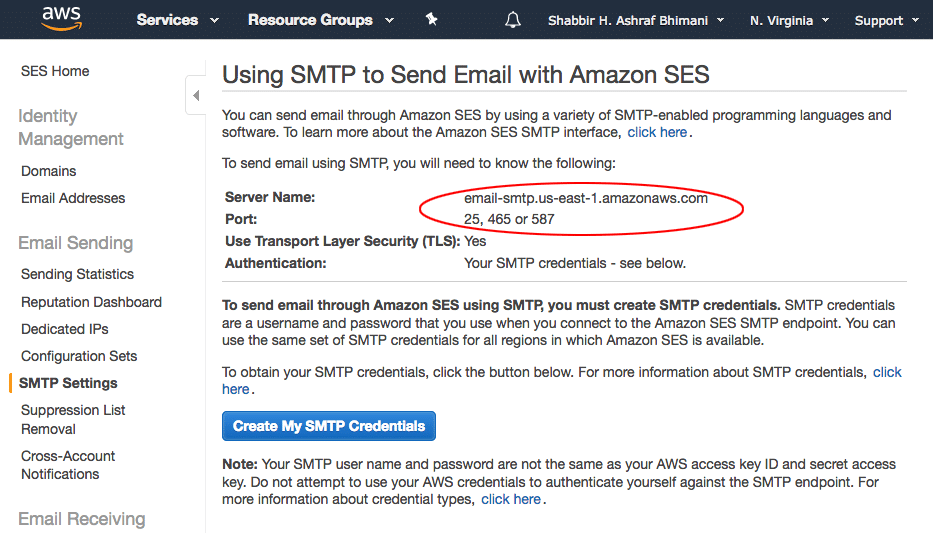

Visit SMTP Settings under Email Sending In the left Menu of Amazon SES and click on Create My SMTP Credentials blue button. Take a note of the SMTP server name and port number which will be needed in the third step.
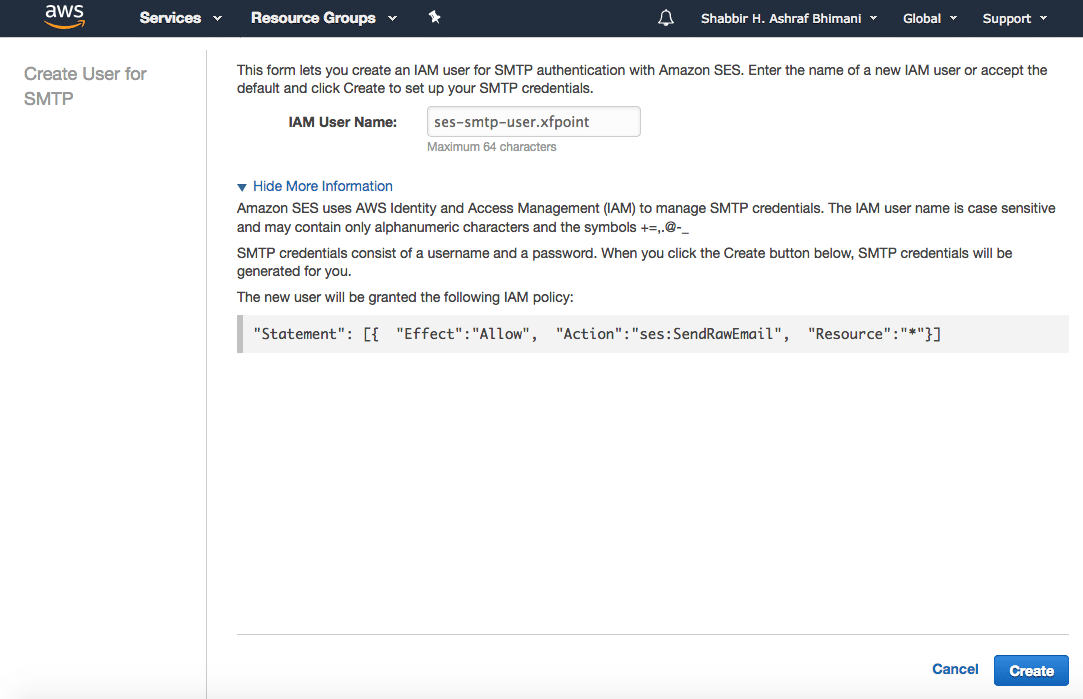

Provide a good looking IAM User Name. Remember it isn’t SMTP username and is only for a reference inside Amazon SES. Click the Create button and your SMTP username and password will be created and be available for download.
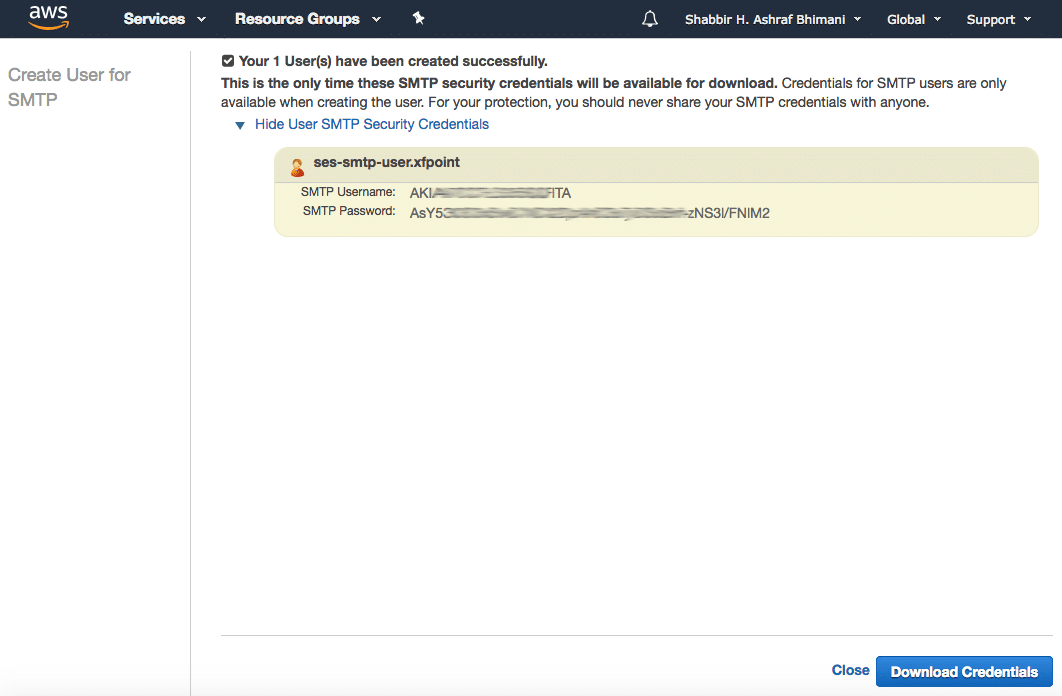

SMTP username and passwords are available for download only once and if you lose it, you will need to recreate a new SMTP username and password.


The smtp user generated is listed under users in the IAM AWS console.
Step 3: Setup XenForo
Login to XenForo Admin Area and visit. Admin CP > Options > Email Options to enter server details and the SMTP credentials from step 2.
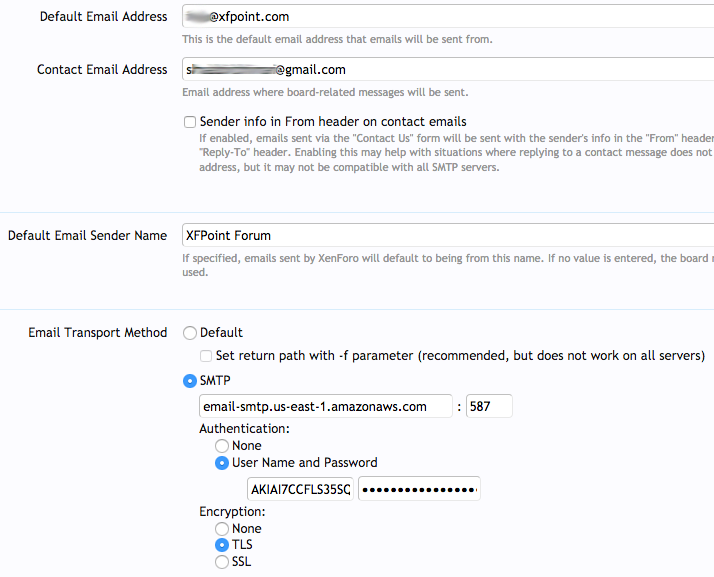

Make sure Default Email Address is from @yourdomain we just verified in the first step.
Note: We will receive the test message at the Contact Email Address and so make sure you have a valid email address for it and have access to it.
Use port 587 (after the “:” field) and choose TLS for Encryption.
Save the settings and then head over to the forum’s contact us page. The link is normally in the footer or it is of the format http://yourdomain.com/index.php?misc/contact
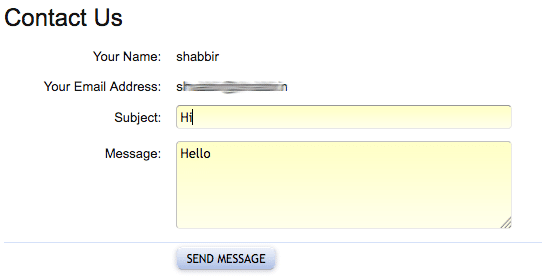

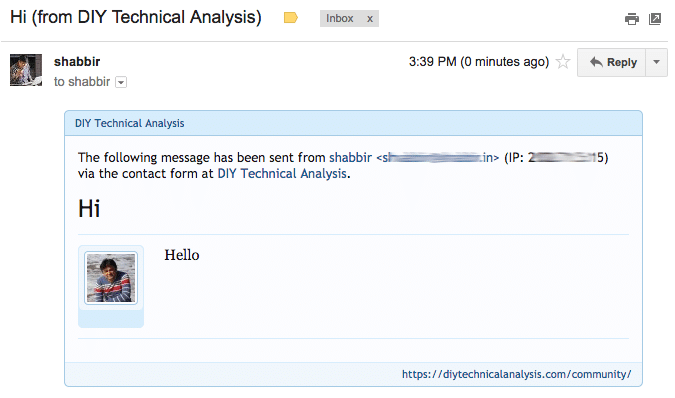
Send a test email and it should reach your Inbox of the Contact Email Address added previously.

Note: New Amazon SES account are in sandbox and may not be able to send emails until a form is filled out here – https://docs.aws.amazon.com/ses/latest/DeveloperGuide/request-production-access.html