Are you looking to move your XenForo forum to a new host or to a different server? The biggest risk of host move is data loss and potential downtime. In this step by step guide, I will show you how to properly migrate a XenForo forum to a new host with no loss of data and have a minimum downtime.
Step 1: Check New Server for XenForo Compatibility
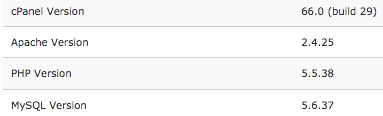
XenForo requires following PHP extensions – MySQLi, Iconv, Ctype, GD, PCRE, SPL, JSON, DOM and SimpleXML. Use the XenForo following requirement test script to check for every PHP modules and extensions installed.


On a new server, MySQL version will be higher than 5 but if you have your doubt, verify it with your host about the MySQL Version in your hosting control panel.

Step 2: Close the XenForo Forum on the Old Server
The first step is to close the XenForo forum on the old server. Visit Admin CP > Options > Board Active and uncheck the “Board is active” checkbox and provide a message for users who may still hit the forum in the middle of a move.
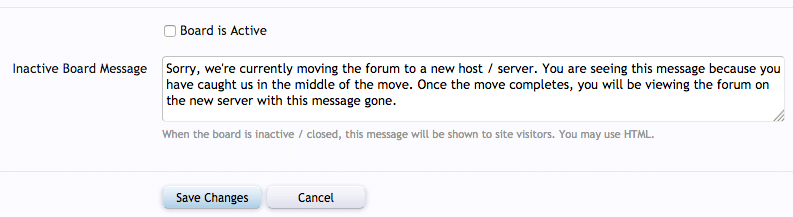

Here is a message I show my users when moving forums.
Sorry, we’re currently moving the forum to a new host/server. You are seeing this message because you have caught us in the middle of the move. Once the move completes, you will be viewing the forum on the new server with this message gone.
Feel free to use the same message or modify as needed.
Step 3: Backup the Database and Files
The database backup process can vary from control panels to control panels.
In CPanel, you can directly download the backup the of database and filesystem using the Backup menu under Files.
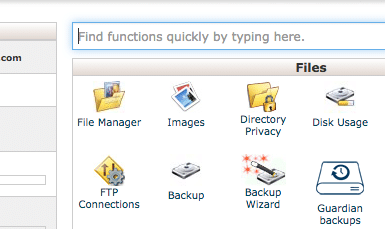

The backup option also has the option to download a full CPanel backup. The full backups also include other details like emails.
NOTE: If you have root access to the new server use WHM, to do a CPanel to CPanel move.
I use MySQLDumper to backup the database and use the server’s file manager to zip the content of the public_html (or its equivalent) folder and keep both the database and files archive files in a folder is accessible through a web browser temporarily.
Step 4: Setup domain on the new server
Setting up a domain or an addon domain on the new server can vary from host to host. You should consult your host documentation to add a new domain to the host.
Step 5: Move the backups
One can download the files from the above step and upload them to the new server using FTP. If your backups are very large, downloading and uploading the backups can take a long time. A server to server move of the backup files will be much faster.
The best way to move the backups from one server to other is through SSH. Using WGET command from the SSH command line, one can fetch the backup files from old server to the new server using IP address.
WGET http://OLD_SERVER_IP/PATH_TO_FILEBKUP
WGET http://OLD_SERVER_IP/PATH_TO_DBBKUP
This way you will have files and database moved over to the new server.
Step 6: Restore Files and Database
Unzip the files you have from old server into the new server’s public_html (or its equivalent) folder. If your file is in .gz format, you can use the gunzip command. The command can vary based on the Linux version.
To restore the database using the command line, you should be able to login to MySQL using the following command
mysql -u <USERNAME> -p
It will prompt for a password, enter the MySQL password for the domain on a new host. Once you have entered the password, you will be at the MySQL command prompt. Now issue the following commands.
MySQL> use <DATABASENAME>
The command will change the database to the one where you want to be restoring the database.
MySQL> Source <MYSQLBACKUPFILE>
The command will start the import process. It can take a long time if you have a very large database backup.
Step 7: Change config.php
Edit the config file to change the new database details. Here are detail instructions on how to edit the config file.
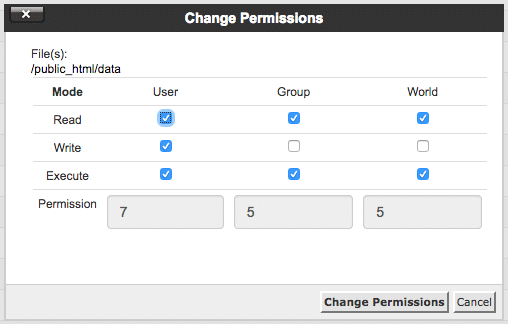
Step 8: Check data and internal_data Directory Permissions
From the file manager, check data and internal_data directory permissions. 755 permission is ideal but if you have issues with 755 permission, set it as 777.

Step 9: Change Host File to verify Configuration
You can change the host files to browse the new site on the new server. Here are detail instruction at HowtoGeek to edit the host file. Put a temporary text file in the public_html (or its equivalent folder) on the new server to identify you are accessing the new server in the browser.
Once you are browsing the new server using a browser, check everything on the new server works fine. SEO friendly URLs, server-side caching settings if any, file uploads etc.
If you had any kind of server-side caching enabled on the old server, make sure you have them disabled on the new server or if they are enabled, you have the right settings in the config.
If you have moved from Apache to Nginx, the htaccess file may not work and you may need to add the rewrite rules for SEO friendly URLs to function properly.
Once everything is verified, make the forum active on the new server.
Step 10: Point domain to the new server
Change the DNS for the domain to point to the new server. The DNS propagation can take anyway between 4 hours to 48 hours and so long as users are hitting the old server, they will see a close message and as soon as they hit the new server, they will see an active forum. Keep an eye on the guests and member online count and if it starts increasing, you should be fine and as DNS propagation completes, you will have all users accessing the forum on the new server.